
The Results App allows you to view test results and export them for further analysis.
There are 3 tabs in the results app :
The Summary Tab
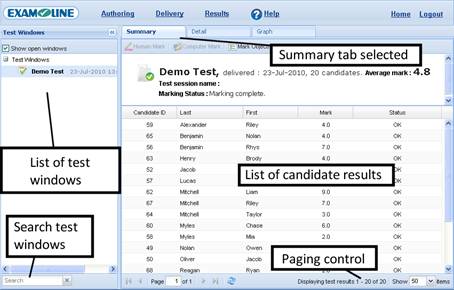
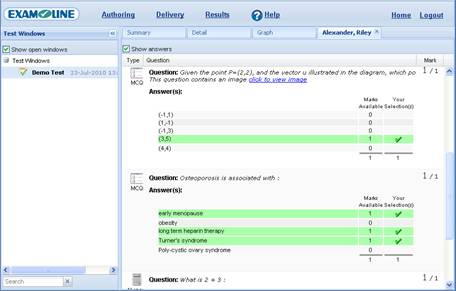
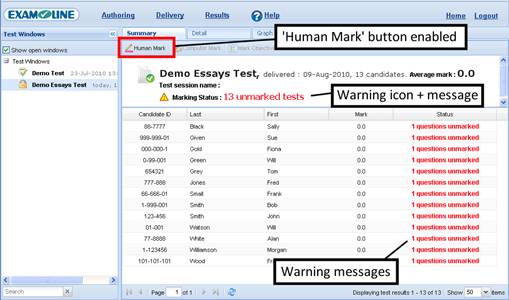
The summary tab shows summary results for the test session selected in the left hand panel, as shown in the image above. Clicking on an individual candidate result open up a further tab showing the actual answers the candidate gave, as shown below.
Detail Tab
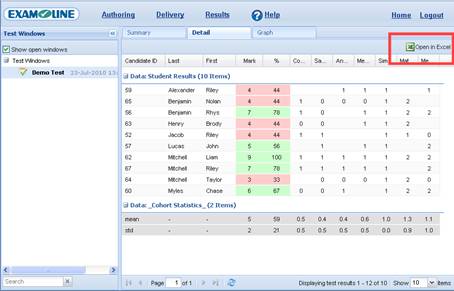
The detail tab shows the mark awarded for individual questions for each candidate, and some simple question statistics, as shown below. From this tab you can also download the data as a Microsoft Excel spreadsheet (using the button highlighted in red in the image below).
Graph Tab
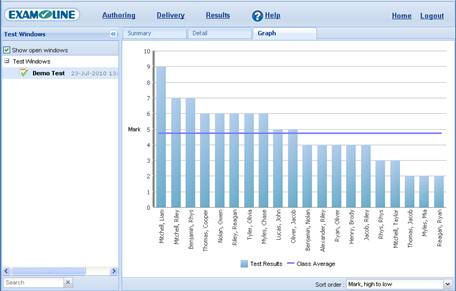
The graph tab shows a graph of candidate results, as shown below. The graph can be viewed using different sort orders.
Human Marking Essay Questions
Essay / extended answer question types require human marking. When viewing student results which include unmarked questions of this type, prominent warnings will be displayed, and the Human Mark button will be enabled, as shown below.
Click on the Human Mark button to open the human marking interface, shown below.
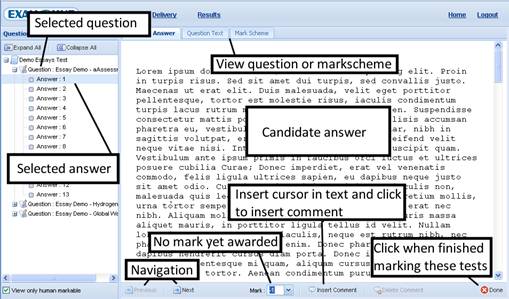
The left hand panel of the human marking interface contains a list of questions in the text document which require human marking (optionally you can display the machine marked questions too by de-selecting the View only human markable checkbox at the bottom of the left hand panel). Click on the ![]() icon next to the question name to view the candidate answers for that question, and on an individual candidate answer to begin marking. You can enter marks and navigate between student answers either by using the mouse or using the keyboard or by using a combination of both.
icon next to the question name to view the candidate answers for that question, and on an individual candidate answer to begin marking. You can enter marks and navigate between student answers either by using the mouse or using the keyboard or by using a combination of both.
Using the Mouse to Award Marks and Navigate Between Answers
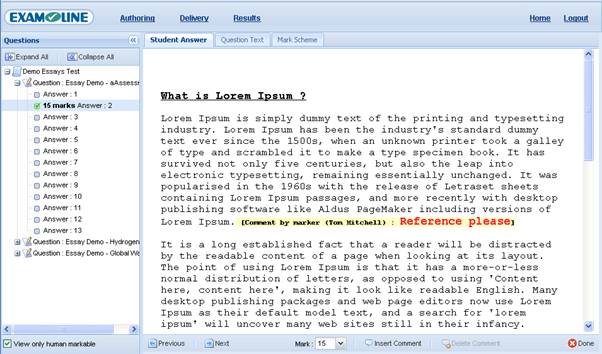
Marks can be awarded to a candidate answer by selecting a mark from the Marks drop down list using the mouse. You can navigate to the next candidate answer by clicking on the Next button on the bottom toolbar (and back again by clicking on the Previous button).
Using the Keyboard to Award Marks and Navigate Between Answers
The human marking interface has been designed to make it easy to award marks and navigate between answers using just the keyboard. For relatively short answers where no comments are inserted, this is typically the quickest way to mark.
When a candidate answer is selected, the Marks drop down is automatically selected. To enter a mark just type the number using the keyboard. Hit the <return> or <tab> key to move to the next candidate answer. The full list of navigation keys which is supported is :
- <return> or <tab> or <right arrow> : go to next candidate answer
- <shift-tab> or <leftt arrow> : go to previous candidate answer
- <c> or <alt-c> : insert comment (the cursor must be in the student answer for this to work)
Inserting Comments
To insert a comment into a candidate answer, click with the mouse where you wish to position the cursor in the text, and click the Insert Comment button or hit <c> or <alt-c> on the keyboard. Enter the comment text in the dialog which appears, and click on OK. The comment is inserted into the candidate answer, and tagged with the name of the marker, as shown below.
To delete a comment, click inside it with the mouse and click on the Delete Comment button.
When You Have Finished Marking
To finish marking candidate answers, click on the Done button on the bottom toolbar.